
As homeowners, many of us reach a point where we crave a change in our living environment. We yearn for a refresh that can transform our familiar spaces into something exciting without the need for a full-scale renovation. One of the most effective yet simple ways to achieve this is by replacing your cabinet hardware. This small upgrade can inject a fresh, contemporary vibe into your kitchen, bathroom, or any space outfitted with cabinetry, and the best part? It’s a DIY-friendly project that most of us can tackle over a weekend. Let’s explore how installing new cabinet hardware can breathe new life into your home.
The Impact of Hardware
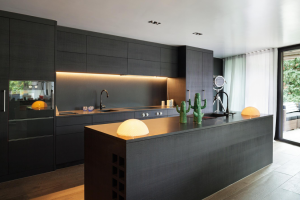
Before diving into the process of installing new cabinet hardware, it’s essential to understand the impact of these minor fixtures. Cabinet knobs, handles, and pulls are akin to jewelry for your furniture. They enhance and add character, reflecting your personal style. Whether your taste skews modern, traditional, rustic, or eclectic, there are endless options to complement your home’s aesthetic.
Changing out cabinet hardware can significantly alter the look and feel of a room. A set of sleek, brushed nickel pulls can modernize a kitchen, while vintage bronze knobs might bring a touch of old-world charm. The right hardware can transform mundane cabinets into a statement piece, adding an element of design that’s both functional and appealing.
Picking the Perfect Hardware
Selecting the appropriate hardware is crucial to achieving the desired effect. Begin by considering the size, shape, and style of your cabinets. Your goal is to find hardware that enhances these attributes rather than overwhelms them.
1. Style Cohesion: Make sure the style of your hardware matches or complements the existing decor in the room. If your kitchen is modern, opt for hardware with clean lines. For a rustic kitchen, consider pulls with a distressed finish.
2. Finish: Hardware comes in numerous finishes—brass, chrome, matte black, stainless steel, among others. Coordinate the finish with other metallic elements in the room, like light fixtures or faucets, for a cohesive look.
3. Size and Shape: Larger handles make a bold statement, while smaller knobs provide a more subtle touch. Consider ergonomic aspects too; the hardware should be comfortable to use daily.
4. Budget: Hardware comes in a range of price points. Establish a budget beforehand to narrow down your choices, and remember that you don’t have to sacrifice style for affordability.
Preparing for Installation
Preparation is key to any successful DIY project. Before purchasing your new hardware, measure the distance between existing holes in your cabinetry (if any) to ensure your new pieces will fit seamlessly. This is especially important if you’re replacing handles, as they involve two screws and precise hole spacing.
Once you’ve purchased your hardware, collect the necessary tools. A screwdriver is essential, and a power drill with a drill bit matching your hardware screws can make the process faster if you need to create new holes. Also, consider having a template or a piece of cardboard handy to help ensure uniformity when drilling new holes.
Step-by-Step Installation Guide
1. Remove Old Hardware: Use a screwdriver to remove existing knobs or handles. If the screws are tight or stripped, pliers might help provide the necessary grip to turn them. Keep the old hardware in a labeled bag if you plan to reuse or sell it.
2. Fill and Sand (if needed): If you’re installing hardware that requires a different hole pattern, fill any unnecessary existing holes with wood filler. Once dried, sand the area smooth to ensure your cabinets look flawless.
3. Mark Your New Holes: For a uniform look, use a cardboard or plastic template designed for cabinet hardware. Align the template with the cabinet edge and mark the drill spots with a pencil.
4. Drill New Holes: Using your drill, create new holes at the marked spots. Be sure to drill straight to avoid angled holes which can cause installation issues.
5. Install New Hardware: Align your hardware with the drilled holes and secure each piece with screws. Ensure that each piece is tightly fastened but avoid overtightening, which can damage the cabinet door or drawer.
6. Test and Adjust: Once installed, test the new knobs and pulls by opening and closing the cabinet doors and drawers to ensure they function smoothly. Make any necessary adjustments.
Enjoy Your Refreshed Space
Once your new cabinet hardware is installed, step back and admire the transformation. Such a straightforward update can dramatically refresh a room, making it feel more current and polished. You might even find that your revamped cabinets inspire further changes, like a fresh coat of paint or updated appliances, creating an ongoing cycle of DIY home improvement.
In conclusion, swapping out cabinet hardware is a cost-effective, impactful way to update your home. It’s an easy project that delivers significant results while also providing an opportunity to indulge in a bit of creativity and personal expression. Whether you’re preparing your home for sale or just eager to refresh your surroundings, new cabinet hardware offers a delightful transformation that will have you loving the space you’re in. So, pick up those tools and get started on your new, stylish home project!